How to Wax Your Bicycle Chain: Step-by-Step Guide
Waxing your bicycle chain is one of the best upgrades you can make to your ride’s efficiency, cleanliness, and lifespan. Unlike oil-based lubes, chain wax repels dirt, keeps your drivetrain cleaner, and may even save you watts on the road or trail. This guide covers all you need to know for successfully waxing your bike chain, with step-by-step instructions and practical tips.
What is Chain Waxing?
Chain waxing involves submerging your bike chain in molten wax, allowing it to soak in, then reinstalling the treated chain on your bike. As the wax hardens, it creates a protective coating that reduces friction and keeps the chain clean. This process is different from applying a drip-on wax lube, as immersion waxing penetrates deep into the chain for long-lasting performance.

Benefits of Waxing Your Chain
- Lasts Longer: Waxed chains need less frequent lubrication.
- Cleaner Drivetrain: Wax repels grit, dust, and muck.
- Improved Efficiency: Reduced friction can translate to power savings, especially for competitive riders.
- Extended Component Life: Less dirt and grit mean slower wear on your chain and gears.
What You’ll Need
- Chain-specific wax (paraffin-based or commercial bike chain wax pellets)
- Slow cooker (dedicated, not used for food)
- Chain quick link or master link pliers
- Chain tool (for removal/installation if not using quick link)
- Degreaser (citrus-based or similar)
- Two containers (for degreasing and rinsing)
- Clean, lint-free rags
- Old toothbrush or small nylon brush
- Disposable gloves
- Wire coat hanger or hook (for dipping/removing chain from hot wax)
- Eye protection (recommended)
Step 1: Remove and Degrease Your Chain
Start by carefully removing your chain from the bike. If your chain uses a quick link or master link, use the correct pliers to open it. If not, you’ll need a chain tool.
Place the chain in one of your containers and cover it with degreaser. Agitate the chain and let it soak for 10–15 minutes, scrubbing with a brush to remove every trace of old lubricant and dirt. Rinse thoroughly in hot water, repeating the process if necessary.
Tip:
A thoroughly cleaned chain is essential. Any residual oil or grit will prevent the wax from adhering properly.
Step 2: Dry the Chain Completely
After degreasing and rinsing, thoroughly dry your chain. Shake off excess water and rub with a clean rag. It’s important to remove moisture, as water trapped inside chain rollers can interfere with wax adhesion. For a perfect job, let the chain air dry for several hours or blow dry it.
Step 3: Prepare and Melt the Chain Wax
Pour the chain wax pellets or blocks into your slow cooker, following product instructions for quantity. Set the cooker to “medium” or the temperature specified by the wax brand. Ideally you want the temperature to be between 90-100 degrees celsius, so use a thermometer to ensure accuracy. Allow the wax to melt completely—this usually takes about 30–60 minutes.
Safety Note:
Do not heat wax over an open flame, as it can catch fire. Always wax in a well-ventilated area.

Step 4: Submerge and Agitate the Chain
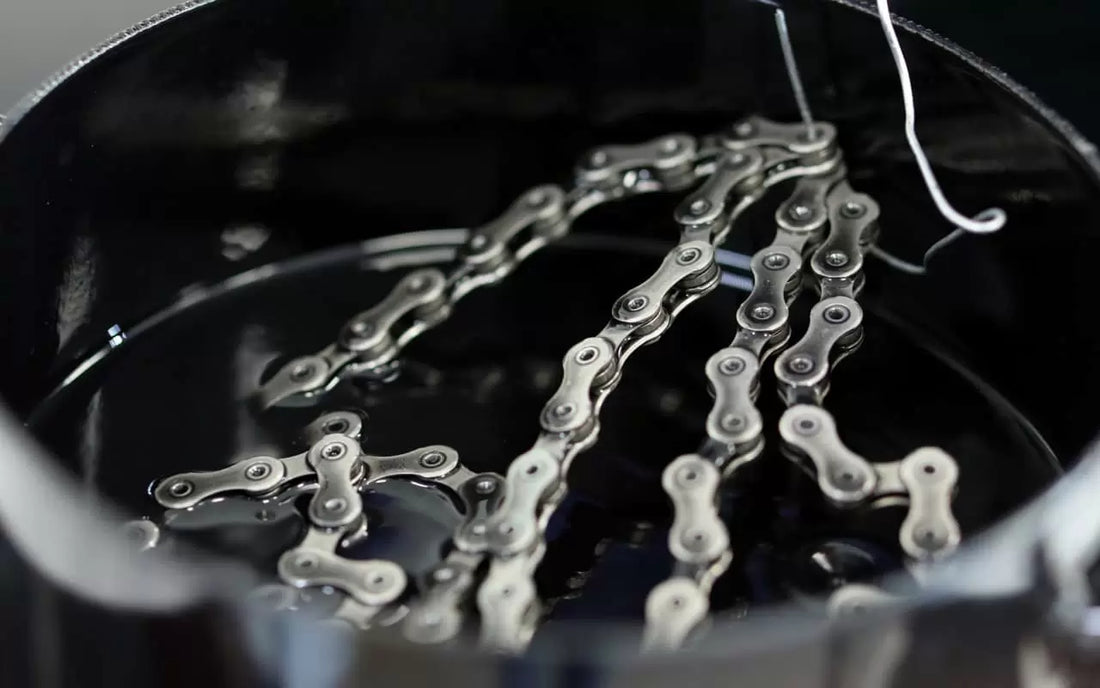
Using gloves and eye protection, hook your dry chain onto a wire or hanger and lower it into the molten wax. Agitate it gently for 3–5 minutes, moving it around so the wax can penetrate the rollers and pins. Tiny bubbles may appear—this is air escaping from inside the chain.
Step 5: Remove and Cool the Chain
Carefully remove the chain from the cooker, allowing excess wax to drip back. Hang it up to cool for about 10–15 minutes. Some wax may harden on the outside—this is normal and will flake off the first time you ride.
Tip:
Hold the chain above the pot for a minute to drip off as much wax as possible.
Step 6: Reinstall the Chain
Once the chain is cool and dry, flex it back and forth to break up any stiffer links. Reinstall the chain on your bike using your quick link or chain tool. Pedal backward for a few revolutions to shed any extra wax.
Expect initial stiffness—this settles after a few minutes of riding.
Step 7: Enjoy a Smooth, Clean Ride
Your chain is now protected, efficient, and ready to ride. Enjoy a quieter, smoother drivetrain. Waxed chains last for hundreds of miles before needing a re-wax—simply repeat the cleaning and waxing process when shifting feels rough or the chain develops noise.
Tips for Maintaining a Waxed Chain
- Avoid using oil-based lubes over wax; this defeats the purpose.
- Store your wax pot/cooker with used wax for the next use.
- Depending on riding conditions, re-wax after 200–400 miles or sooner in wet, gritty environments. Using boiling water to remove remaining wax from the chain, then repeat Steps 2 -6 above.
- Use a second chain: Keep one on the bike, one in the wax pot, and rotate as needed.
Frequently Asked Questions
Q: Can I wax a new chain?
A: Yes, but you must still degrease it first. New chains come coated in thick factory grease.
Q: Is waxing hard to do?
A: The process is simple once you have the setup and your chain is properly cleaned.
Q: Is drip-on wax the same?
A: Immersion waxing with molten wax penetrates much deeper than drip-on wax lubes.
By following these steps, you’ll keep your bike running cleaner and faster, with less mess and more fun every ride. Happy cycling!

